As you may know, I’ve been remodeling my office. The complete remodel post is coming soon but until then, I wanted to share some decorating and DIY posts until the room is complete. For now I’m going to show you how I transformed my desk chair and teach you how to paint a faux leather chair.
Overview
I’ve mentioned before that I’ve been planning this room since we decided to move in October 2016! That means that I’ve literally being looking for inspo, hardware, furniture and decorative items for almost a year and a half! I knew that I wanted it to reflect the color theme of the main house and have a balance of both feminine and masculine characteristics.
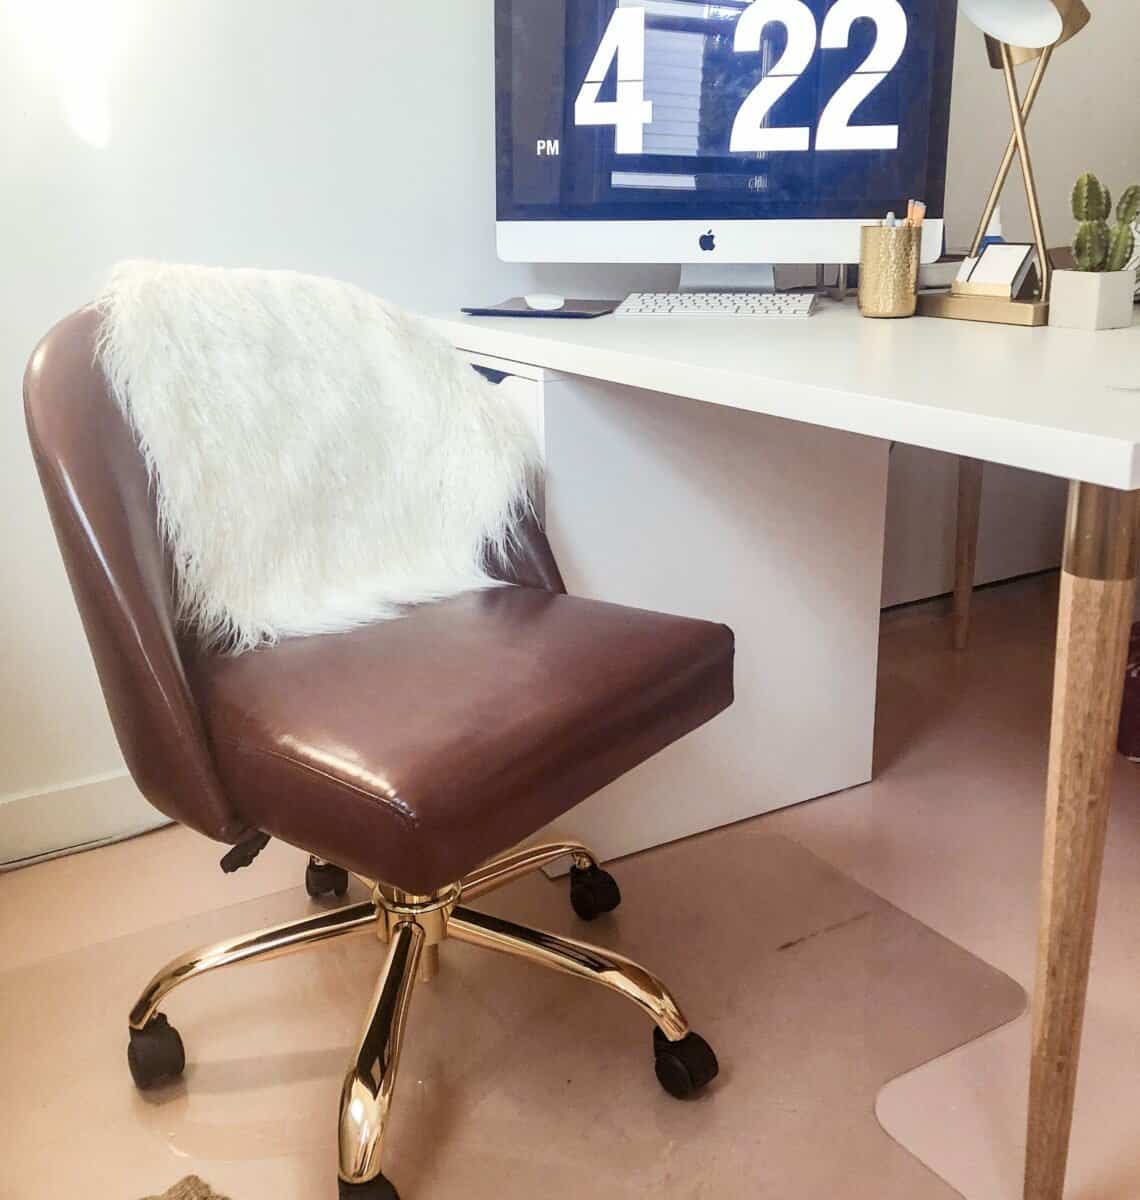
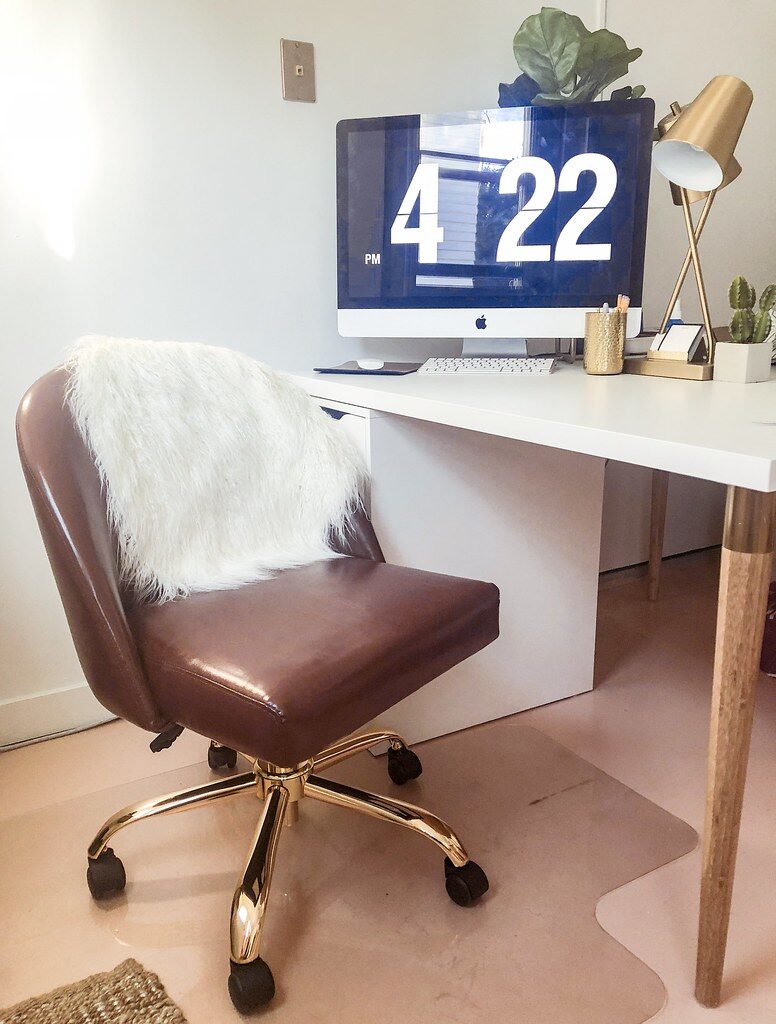
In the photos you can see that the walls and furniture are mainly white. The light peach floor gives the room a feminine vibe (although it reminds me of desert sands) so I wanted to balance that out. I felt that adding in some brown leather would be a great masculine counter part to all the white and peach floors. So the hunt was on for the perfect brown leather desk chair!
Found! or not?
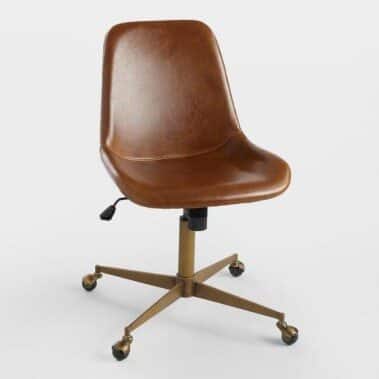
I know I saw this chair on Instagram but I can’t remember who posted it. I instantly knew that this chair was THE chair. It was leather. The details were bronze/gold. And it rolled and was height-adjustable.
Only problem? It was $250 and it was constantly sold out. If it had been in stock when I originally found it, I’ll be honest, I would have bought it. Because that’s the type of person I am. I’d rather buy something, have a chance to get a feel for it and then return it if it doesn’t work than miss out on something.
But this was sold out when I first found it and for months after. This gave me time to really think about that price … $250 for a desk chair is kind of ridiculous right? They have a non-rolling version as well and I found it in store to test the comfort. It was comfortable but not so much that I could justify spending (to me or my husband) $250 on a desk chair. So on the search went …
Found it but …
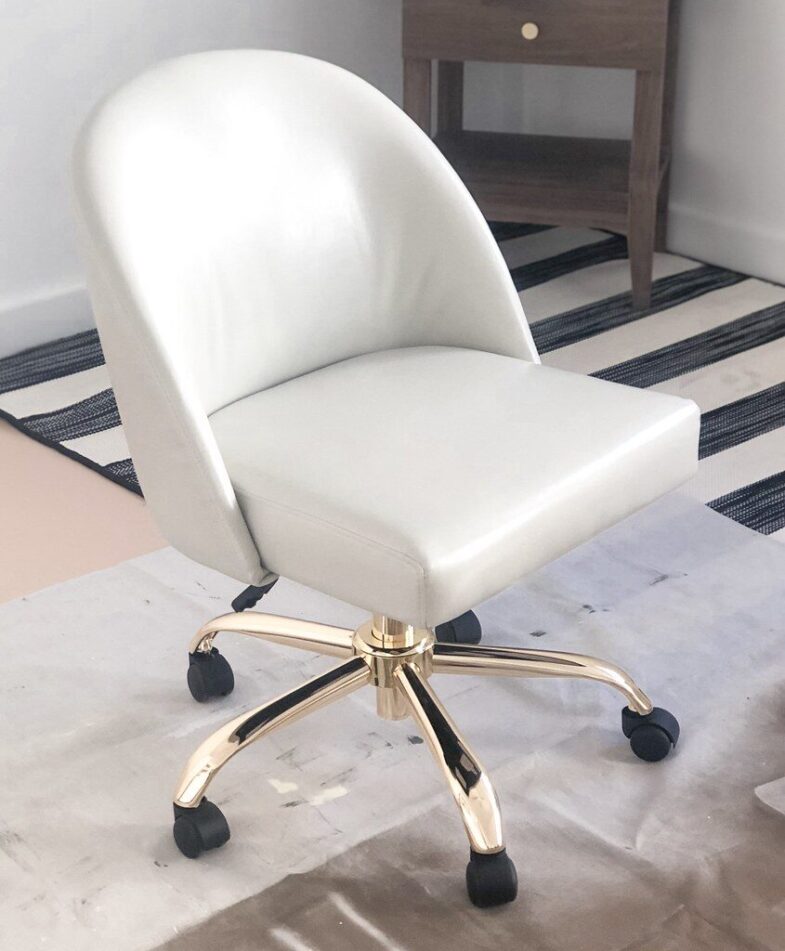
One day, while scrolling through the Target app, I found a desk chair that mirrored the shape and style of the original chair I liked. It was also a way better price at $170. Can it be true?!
Not so fast, problem was that it was this grayish-white color. There was nothing wrong with the color except a white chair with a gold base in a white room with light peach floors was way too feminine. Damn it.

So then I was scrolling through Facebook and saw a post from Apartment Therapy about painting a leather couch (how suspect coincidental is that hmmm Facebook?).
So I started researching that and feeling excited that I would be able to get the exact thing I wanted. The chair I was looking at was faux leather so I wanted to make sure that I wasn’t going to screw it up and then be left with a $170 ugly ass chair that I couldn’t return.
Everything I read said that it was fine to use the acrylic leather paint on faux leather. Yaaaaas!
Let’s Paint This B*#!H
So I bought the chair! And of course Target, being the amazing place that it is, had extra discounts running so I got it for $100 total! I ordered my supplies off of Amazon (Prime is both a god-send and a curse) and was ready to paint my chair. Only thing was I needed to wait for the room renovations to be completed; which happened about a month and a half after I purchased the chair.
Paint a Faux Leather Chair
Skill Level: Beginner
Total Time: 30 minutes each coat
Materials Needed:
- Faux or Real Leather Desk Chair
- Angeles Brand Acrylic Leather Paint
- Angeles Brand Acrylic Finisher
- Sponge Brush
- Paint Cup
- Drop Cloth
Instructions:
- Lay down your drop cloth. Don’t tell yourself that you’ll be extra careful and skip this step. Because something will drip. And I don’t want to think about how to get acrylic paint off the floor or carpet. They’re cheap and you can reuse them for so many things (hello spray paint projects!)
- Assemble your chair or if it’s something you already have move it onto the drop cloth.
- Pour a small amount of acrylic paint into your paint cup. Acrylic paint dries pretty quickly. You don’t want to lose your product so work with small amounts at a time. I used a wider sponge brush.
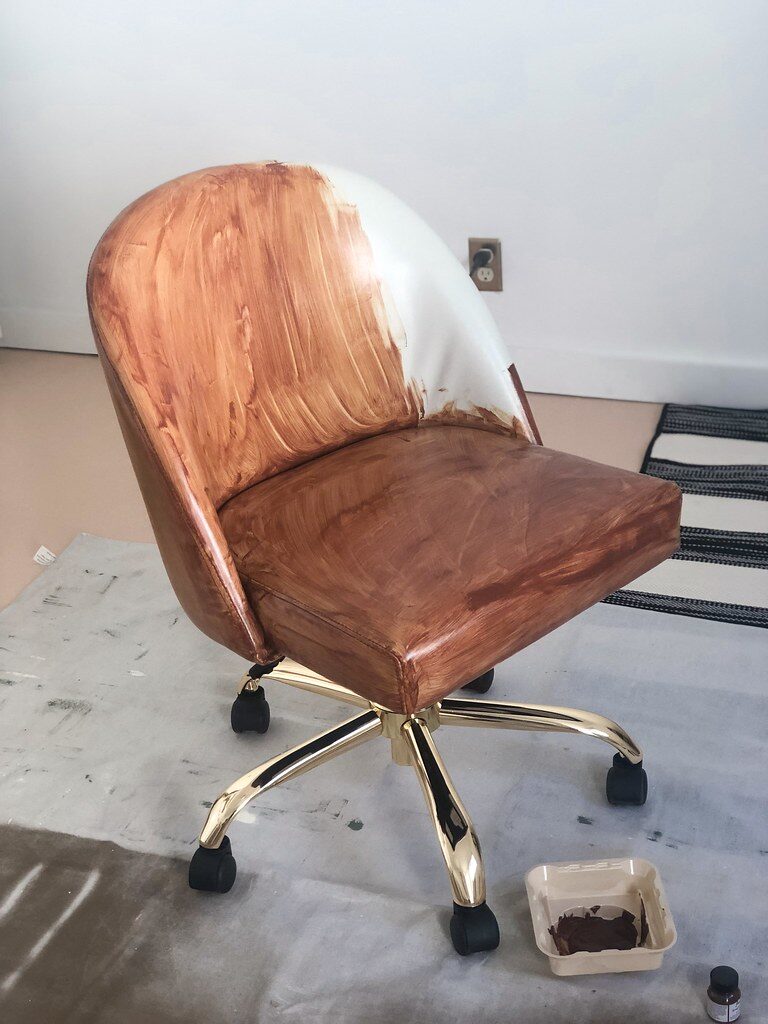
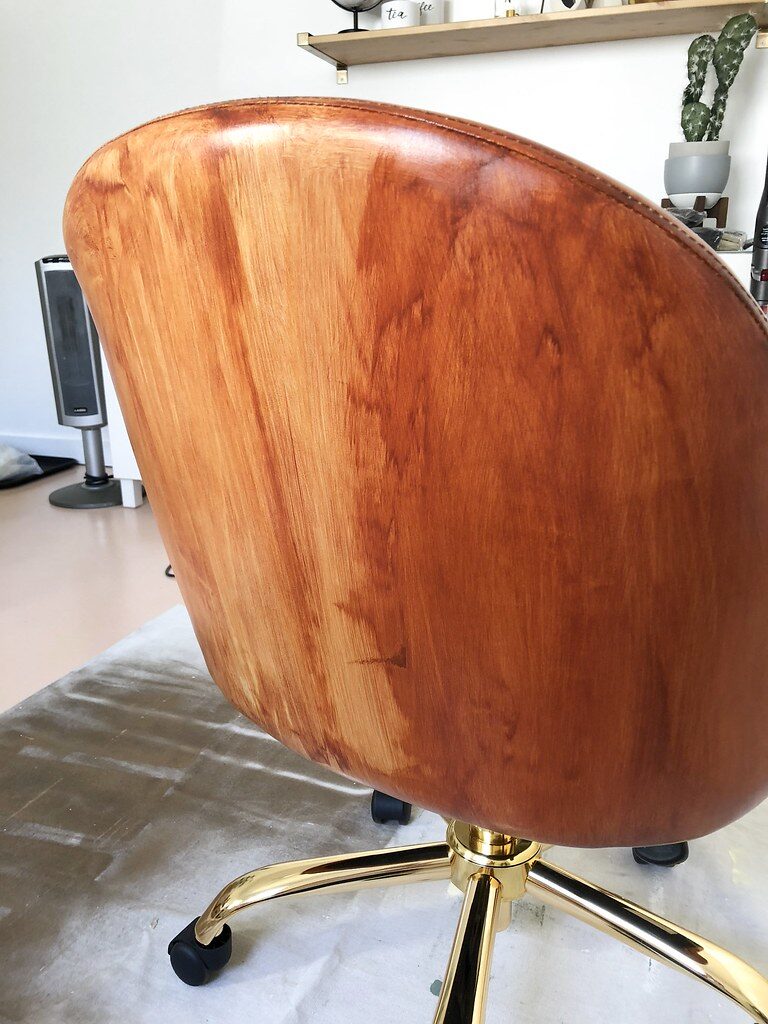
- Apply the paint in long strokes and thin layers. Thin layers are important so the surface remains smooth and even. It’s going to look like a mess at first but, trust me, it’ll all work out. I freaked out a little bit too but just trusted the process.
- Make sure and cover all seams and threads. Get in all cracks and crevices that might show the original color when the piece is sat on. Make sure to smooth out extra product to get thin coverage.
- It took me about 10 minutes to paint my whole chair. Let each layer dry 20 minutes before starting a new layer. I had a ceiling fan and space heater on during this process. I went and did other chores while waiting for each layer to dry.
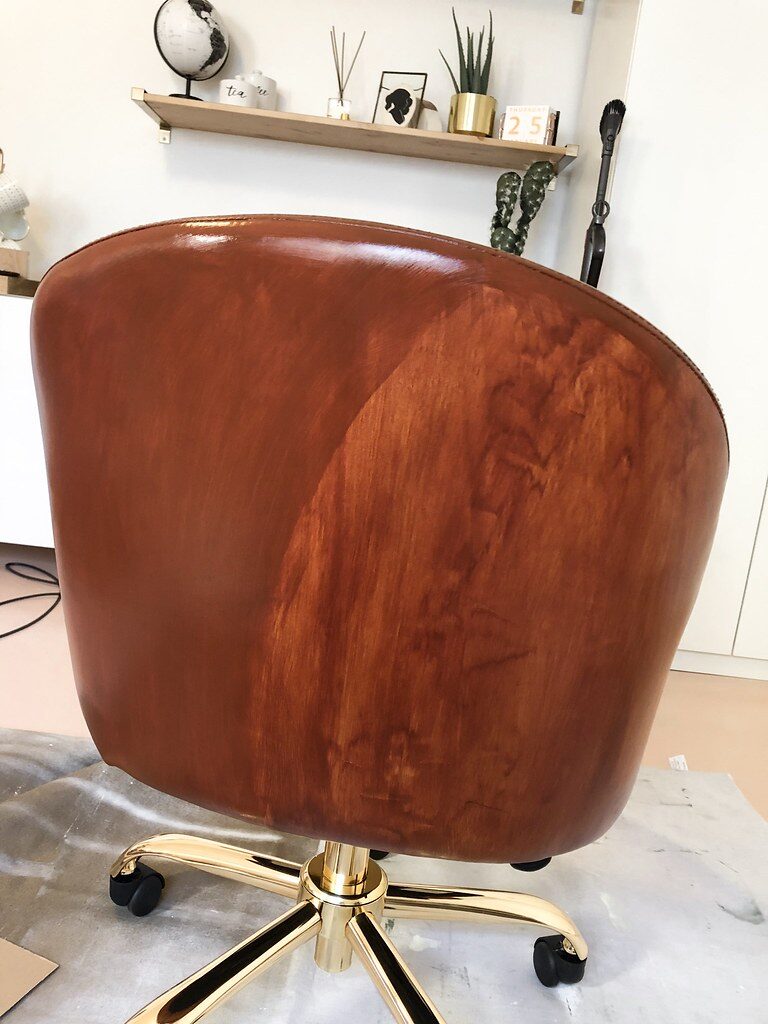
- It took 4 coats to get my chair to the opaque color that I achieved. But do as many or little as you like for the look that you want.
- Apply the finisher (you can get glossy or matte – I chose glossy) in the same manner you applied the paint. Long strokes and thin layers. It will bubble up when you first apply it. Let each section dry a minute and then brush out the bubbles. It will also have a blueish tint on initial application, which is normal, that will go away when you brush over it after it dries a few seconds.
- Let the piece dry overnight to insure that no scratches occur from you sitting on it.
- Style and marvel at your DIY skills!


1 Comment