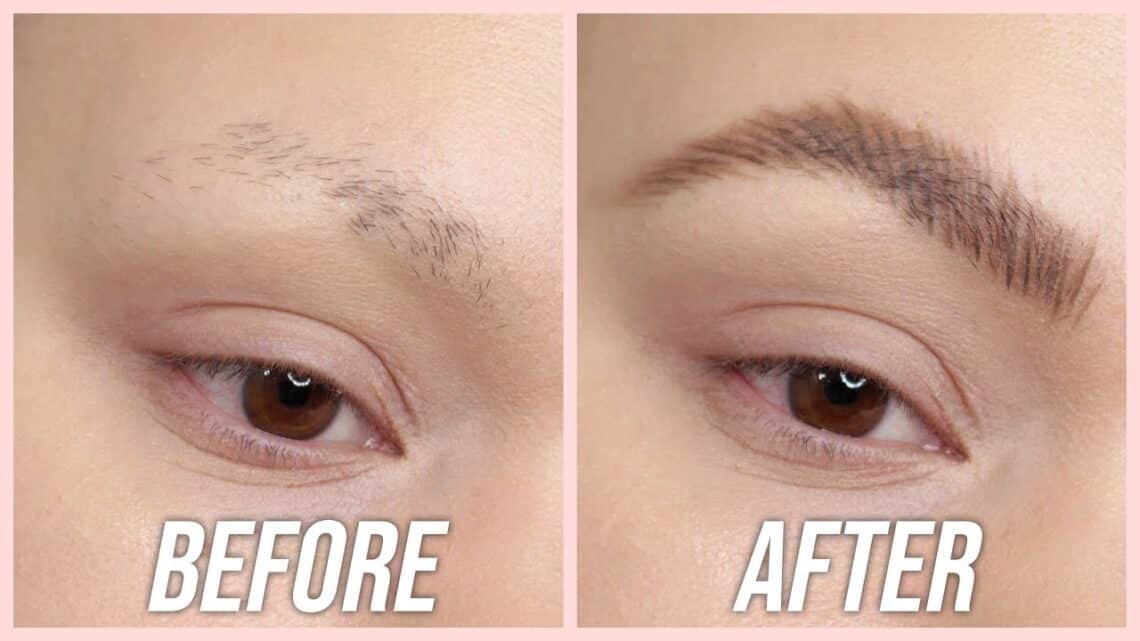
Who knew that eyebrows would be so important? Or that not everyone looks great with the pencil thin eyebrows that were popular in the 90s? Obviously not me. So in this HOW TO brows edition, I will be sharing with you guys how I make my bald brows look fuller and still natural. I had pretty sparse brows to begin with before I plucked most of them away. Now I am trying to grow them back but years of abuse has made those tiny little hairs wary for fear of just being yanked out again. I do use a lash boosting product on them but after 20 years of abuse, I don’t expect them to come back over night but they ARE growing back slowly but surely.
The reason I decided to make this post is because I meet a lot of people who have the same problem: over-plucked eyebrows where no tutorial seems to cover the issues they have. Besides having over-plucked brows, I have sparse eyebrow hair, meaning that they are made up of fine and more spaced apart hairs, AND I also have a really oily T-zone that breaks down most of the products that I apply in that area.
I will break down the steps I go through but I also filmed a video for this content so feel free to scroll down and check it out!
STEP 1:
Like I said before, my oily T-zone breaks down most makeup that I apply there so I need to figure out a way to make my brow products stay in place. Enter MAC 24-Hour Extend Eye Base, $23. Applied lightly to the areas I have the least hair, this helps my eyebrows stay on through 12 hour shifts and even through a massage with my face pressed into the face rest! I take a very small amount and apply it to the places with no hair and then smooth the rest through my eyebrows and then let it sit for a minute so it becomes tacky and holds the products better.
step 2:
I outline the bottom shape of my eyebrow using Kelley Baker Brows Smudge Brush,$26 and KKW Beauty Creme Highlight, $48,making sure to follow my brow bone. If you’re not sure what shape works for you, using an eyebrow stencil is really helpful to start you out. I used the Full Arch stencil from Anastasia Beverly Hills Stencil set, $20, to give me an idea of the shape that I wanted.
Step 3:
Using Benefit Cosmetics Precisely, My Brow Pencil, $24, in #4 I first draw an outline of the shape I want and then light fill in the shape. Everything with eyebrows should be with a very light hand. This can’t be emphasized enough. It’s very easy to get too dark too fast, especially if you’re priming your eyebrows like I do. If you do happen to get a little to dark, use a spooly brush to comb through the area and lift off some of the product.
Step 4:
Now is where we are going to make them look naturally fluffy. To do this, I use a pomade formula with a synthetic brush to make strokes that mimic brow hair. This part doesn’t take me much time now that I’ve been doing it for so long. But I definitely learned to take my time when I was starting because sometimes my eyebrows would be way too dark and dense. To prevent this, its good to draw a couple strokes, take a step back and inspect your work and then do some more. Remember, no one is going to be right up close to your face so stepping back gives you the perspective of what other people will see and keep you from piling it on. The brow pomade I use is Benefit Cosmetics Kabrow!, $24, in #4 and I apply it with a Smith Cosmetics 203 Micro Angled Liner Brush, $18. I like this brush because its synthetic so I get a nice thin, clean like but it’s bristles are very short which makes the brush stiff and gives me more control of what the stroke looks like. Another good synthetic liner brush is the MAC 263 Angled Liner Brush, $20.
Step 5:
I’ve tried every brand of brow gel and none of them hold the front hairs of my brows straight up like I like them so I use the technique called ‘Soap Brows’ instead. (I originally heard of this method on YouTube from Pixiwoo) Its basically wetting a piece of soap and then lightly scraping a spooly brush over it and then combing through your brows with it. The soap hardens and holds them in place all day. Another bonus is that the soap also gives the illusion that the hairs are thicker than they actually are. The soap I use is a travel soap from L’Occitane, $8 (thanks to @katy for the best soap reccomendation!). I spray it with a little MAC Fix+, $25 to wet it and then run the spooly from my Benefit brow pencil through (see the video below for a visual of how much to load up on the spooly).
step 6:
I use the smudge brush to blend out the highlight and clean up the brow. Then I use the shimmer side of the KKW creme highlighter to add a pop to my brow bone and give it a lifted appearance. And you’re done!!
Let me know what you guys think or if you have any questions, please feel free to ask!

No Comments