Your skin care routine // The order in which you apply your skin care products is very important because it can affect how effective they are. I’m going to share what + why I’m using certain products and explain how the order in which you apply products can affect their effectiveness. Read on to learn tips to improve your own skin care routine!
The general formula for skin care product layering is that you start with those that have the thinnest consistency and finish with those that have the thickest consistency.
Essence/Toner → Serums → Eye Cream → Moisturizer
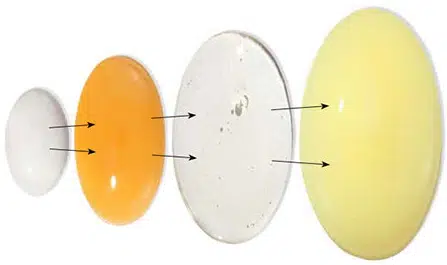 This is flexible depending on what you’re trying to achieve. If the active ingredients/serums you’re using are super potent, you can apply them after a thin layer of moisturizer so your skin doesn’t get irritated. But this formula is generally what you should stick to in order for you to achieve the benefits of each product. I’m going to share the specifics of my routine and why I do it way the way I do.
Another important part is letting each product sink into the skin before applying another one on top. Reason being that if you just apply them immediately on top of each other they might pill up and not even work except to make a mess on your face. I apply products over my whole face, front + back of neck, décolleté and hands.
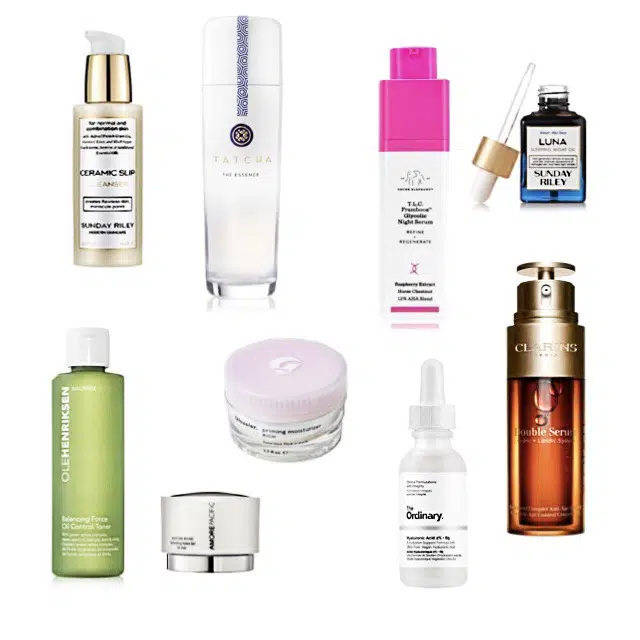
Sunday Riley Ceramic Slip Cleanser, $45 / Tatcha the essence plumping skin softener, $95 / Drunk Elephant T.L.c, Framboos Glycolic night serum, $90 / Sunday Riley luna Sleeping night oil, $55 / Clarins double serum complete age control, $89 / The ordinary hyaluronic Acid + b5, $7 / Olehenricksen Balancing face oil control toner, $26 / Amore Pacific moisture bound rejuvenating eye treatment gel, $85 / Glossier priming moisturizer rich, $35
Step 1: CLeanser
If I’m wearing makeup, I do a double cleanse; first cleaning off the makeup with a towelette (I use these) and then follow up with a cleanser. I only use cleansers that leave my skin feel clean but hydrated; cleansing oils and balms are great for this. Cleansers that leave your skin feeling tight are, in my opinion, not good for anyone because they are stripping the skin of all the oils which will cause the skin to overcompensate and produce even more oil. Eve Lom Muslin Cloths, $22, are great for washing off all the cleanser and adding some light exfoliation at the same time.
Step 2: Essence | Toner
This step depends on my current skin condition. If I’m having a break out, I will use a toner to treat the skin and prevent further breakouts. I use a cotton pad to gently wipe this on my face (this will also show you how well or not-so-well you’re cleaning your face).
Next is essence; which is something I use every night. What is an essence? It’s a product that increases the hydration in your skin and makes every product you layer on top of it work better. Another and more affordable, but still amazing, essence is MAC Lightful-C Marine-Bright Formula Softening Lotion, $30.
Step 3: Eye Cream + Serums
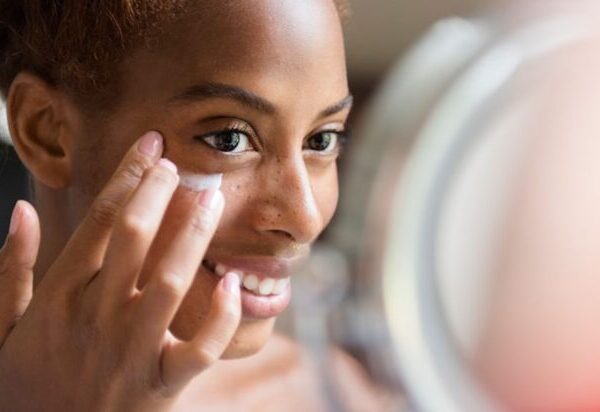
It doesn’t really matter which you do first because you’re not applying your serum to the eye area and vice versa. Eye cream should be applied with your ring finger and patted starting at the outer corner and working in to the inner corner. I use a more intense eye cream at night to get the benefit of not wearing makeup and letting it work hard while I sleep.
If you’re curious about what active ingredients are right for you, check out this post. Personally I like to layer a few different serums on top of each other but there are definitely some I don’t use together. The reasoning behind this is that you don’t want to overwhelm the skin or cause irritation. Nighttime is when I use more concentrated/stronger serums like retinols and stronger BHA/AHAs. I do this for two reasons: one, stronger concentrations can increase photosensitivity and two, my skin won’t have any makeup on top to interfere with their effectiveness.
The way that you layer your serums determines their effectiveness. When deciding how to layer them take into consideration your skin type first. Do you have sensitive skin? If so, you may need more than another serum as a buffer; you may actually need to apply your active ingredients on top of your moisturizer to avoid irritation but still reap the benefits of the active ingredient.
I usually apply a non-specific age control serum first as a buffer layer, then the active serum and top it off with hyaluronic acid. In my routine, I always use hyaluronic acid at night because I find that when makeup is applied over it that it pills up. If your serum is a more watery consistency then it should be fine to use under makeup but mine is a thicker consistency. Doing this also ensures that I wake up with plumped skin that free from fine lines.
Step 4: Moisturizer
The final step is to moisturize. I always always always use a heavier moisturizer at night. I do this because I want to take advantage of the fact that, as I said before, I’m not out in the sun or wearing makeup. We also run a humidifier in our room and using a heavier cream is the perfect opportunity to make sure my face is super hydrated. This helps fight all those fine lines and make your skin look plump.

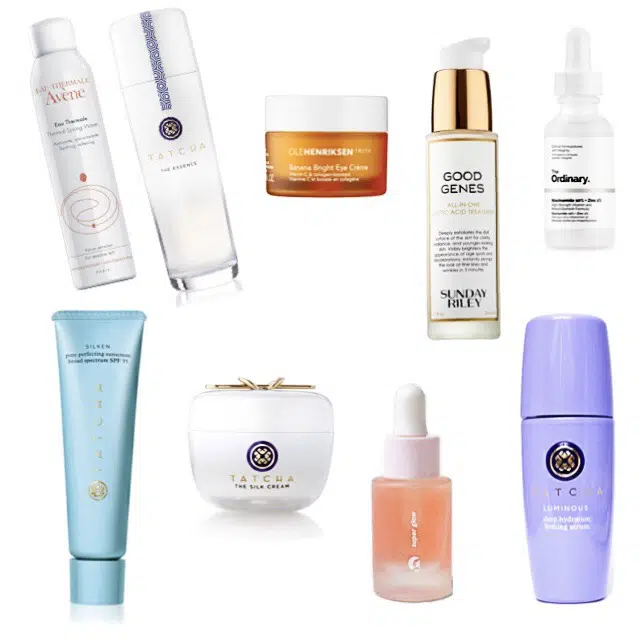
Avene Thermal spring water spray, $19 / TATCHA THE ESSENCE PLUMPING SKIN SOFTENER, $95 / OleHenriksen Banana bright Eye crème, $38 / Sunday riley good genes, $105 / The ordinary niacinamide + zinc $6 / Glossier Super Glow, $28 / Tatcha luminous deep hydration firming serum, $95 / Tatcha The silk cream, $120 / Tatcha silken pore perfecting broad spectrum sunscreen SPF 35, $65
My daytime routine is similar in the same general steps as my nighttime routine but with a few key differences. One being that I do not wash my face with cleanser in the morning. My face is still clean from the night before so why waste the time? The only time I even get a wash cloth out in the morning is if I did a spot treatment on blemishes that I need to clean off.
Step 1: Refresh
The first step is waking my face up with some spring water. Evian Natural Mineral Water Spray, $13 works just as well as the one I use. Two reasons for using this, as opposed just splashing my face with tap water are one, we have hard water in the area we live and it’s extremely drying to the skin and two, French women, who are known for amazing skin do this, so I do it too. I’m kidding; but, in truth, this formula has been around since 1743 and has been proven to naturally soothe red, sensitive and irritated skin. It might be bougie but it makes my skin look good. I spray this all over my face and then pat dry with a towel. That’s it.
Step 2: Essence
Again, I use this to help increase my skin’s hydration and make whatever I active products I place over it work better. As I mentioned above, a more affordable but equally amazing alternative is MAC Lightful-C Marine-Bright Formula Softening Lotion, $30.
Step 3: Eye Cream + Serums
In the morning I love using something that’s going to hydrate and brighten around my eyes so I don’t have to use a ton of makeup. I can’t stress enough how important it is to be gentle with this skin – use your ring finger and pat gentle or suffer the wrinkles.
The serums I use in the morning are more likely to be hydrating or antioxidants to combat any sun damage. Sometimes I will use an AHA treatment to help in fading dark spots from old sun damage or blemishes. But it needs to be one that is mild enough to use during the daytime without causing any irritation. All the same, I alternate days using AHAs because they take awhile to show irritation and once it’s there it takes awhile to go away.
Step 4: Moisturizer + Sunscreen
My skin is combination: oily in the T-zone and normal on the perimeter. But that doesn’t stop me from using a super hydrating moisturizer during the daytime. I prefer to have my skin super hydrated; even if that means I have to blot some oil or powder my nose a few times.
Sunscreen is a must for whenever you go out in the sun. Especially if you’re using retinols or acids. I cannot stress that enough. I like to mix my sunscreen and moisturizer together to cut out an extra step.

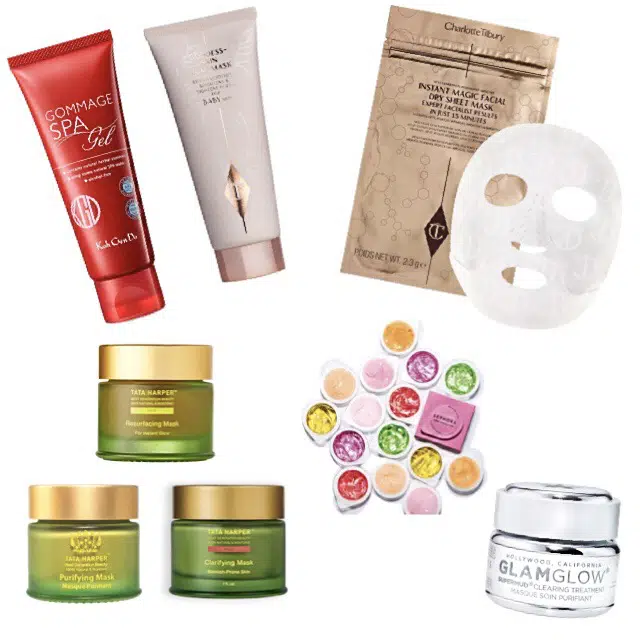
Koh gen do soft gommage gel, $48 / Charlotte Tilbury Goddess skin clay mask, $55 / Charlotte tilbury Instant magic facial dry sheet mask, $22 / Tata harper resurfacing mask, $58 / tata harper purifying mask, $65 / tata harper clarifying mask, $68 / Sephora masks, $4-8 / Glamglow super mud clearing treatment, $69
Masks:
Masks are something that I equate with ‘me time’. Don’t they bring up the image of you in a fluffy bathrobe, hair wrapped in a towel, colored clay mask delicately painted on your face and your eyes covered with cucumber slices? I’m relaxed already. Okay, but seriously, I use face masks a couple times a week to give my face a little TLC. I really use and love all the ones I’ve pictured; let me give you some more detail on them.
The Koh Gen Do one isn’t a mask. Its a gel that you rub on your dry face that breaks up all the dead skin. It literally balls up as you rub it in and then you wipe it off. Its quick and leaves me with instantly smoother skin. I even use this on my cuticles or heels of my feet when I don’t have time for a mani/pedi.
The Charlotte Tilbury masks are ones I typically use before putting on makeup when I will be photographed. They’re both hydrating and soothing; the difference is that the sheet mask is doesn’t require you to wash anything off afterwards.
Tata Harper is an amazing brand that doesn’t include any chemical in her products which is always a bonus! Her masks are pricey but they work and don’t irritate my skin. The Resurfacing mask is great for getting a glow. The Clarifying and Purifying masks both work to decrease blemishes and oiliness but the former includes AHAs and the latter does not.
Who doesn’t already know about Glamglow? They offer a lot of different masks. Supermud is my favorite because its a power house at cleaning up pores and giving a tight appearance. I also use this on stubborn blemishes.
The Sephora masks come in multiple forms: gel, sheet, and clay. They also have a few for your feet and hands. These are affordable and lightweight so you don’t have to worry about your skin getting irritated by too many active ingredients. I like to get these for spa parties.

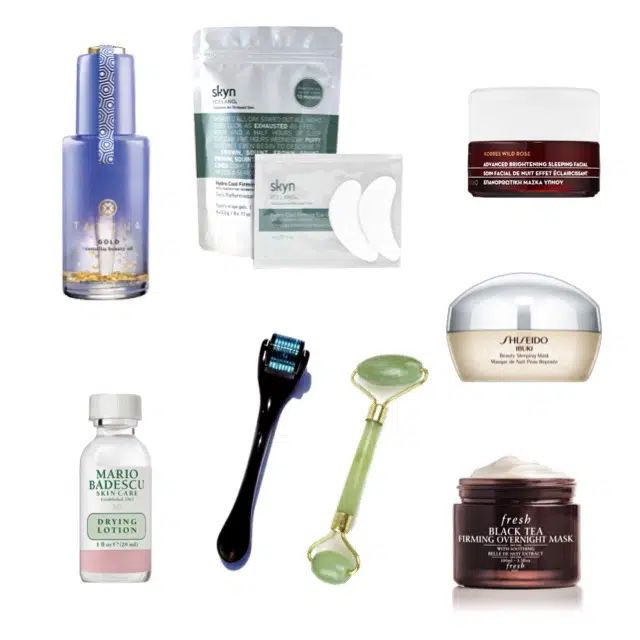
Tatcha gold camellia beauty oil, $95 / Skyn iceland hydro-cool firming eye gels, $30 / Korres advanced brightening sleeping facial, $48 / Shiseido ibuki beauty sleeping mask, $40 / Fresh Firming overnight mask, $92 / mario badescu drying lotion, $17 / stackedskincare micro roller, $30 / herbivore jade facial roller, $25
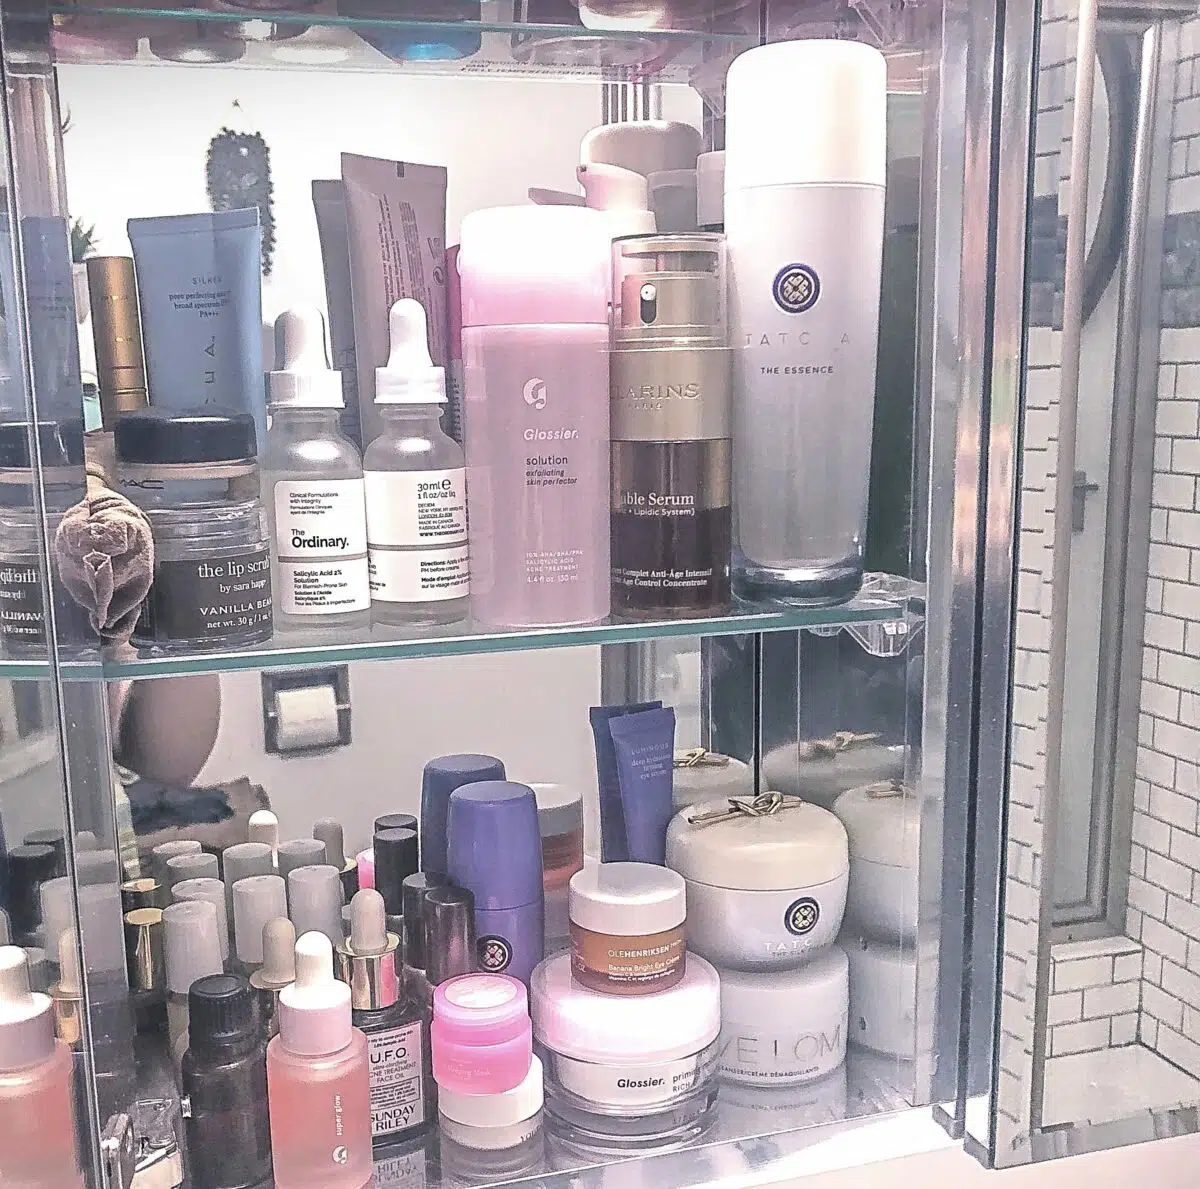
Sometimes you need a little extra. I know it’s hard to imagine that, after all those steps, there could possibly be anything else that could be done. But there’s always room for more.
Facial Oil:
Facial oil has so many uses that I always have one in my beauty cabinet. You can use after moisturizer to seal everything in and add extra hydration, prep your skin for makeup and mix in with foundations to sheer them out.
Eye gels:
If you’ve ever woken up after a bad night’s sleep (aka hungover): you know your eyes show how tired you really are. An easy way to decrease puffiness is with eye patches; especially if you keep them in the refrigerator!
Spot Treatment:
Blemishes are a pain in the ass and none of us are immune from getting them. I use a spot treatment at night as a last step. Mario Badescu Drying Lotion is a tried and true favorite. Dip a cotton swab down into the pink cream and then dot it over your blemish. Simple as that and don’t shake the jar!
Overnight Masks:
Nighttime is the perfect time to use products that work really hard and overnight masks are one of my favorite to add on. I usually use masks that focus on hydrating on firming because I want to wake up looking super fresh. These are a great option to use if you’re too tired to do all the normal steps in your routine.

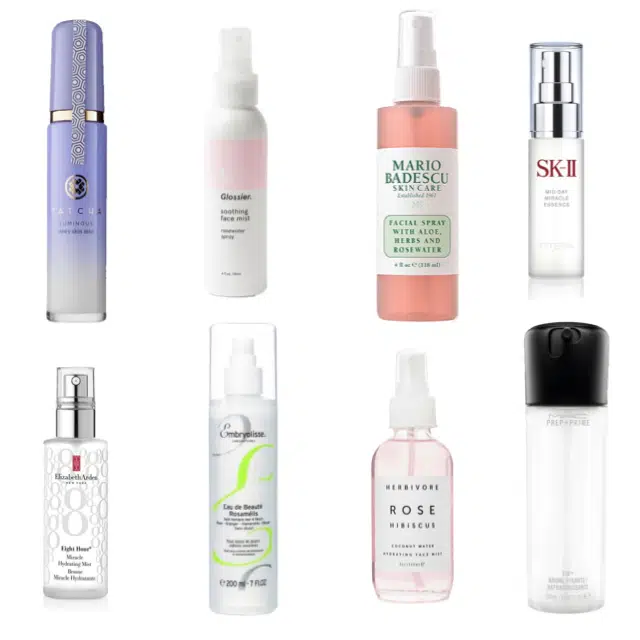 Tatcha luminous dewy skin mist, $48 / glossier soothing face mist, $18 / Mario badescu facial spray, $7 / SK-ii midday miracle essence, $80 / Elizabeth arden eight hour miracle hydrating mist, $19 / Embryolisse eau de beauté rosamélis, $28 / herbivore rose hibiscus coconut water hydrating face mist, $32 / Mac Cosmetics Fix + Spray, $26
Facial Mists:
Facial sprays can be used to prep your face, set makeup and refresh your face/makeup throughout the day. Fix+ is the original face mist, at least for me. Now there are so many different kinds of facial sprays that it’s hard to figure out what you need. For me, a facial spray needs to be refreshing and calming; both in scent and for my skin. The ingredients that I look for are green tea, cucumber, rose and glycerin.
So this long AF blog post sums up my skin care routine. I hope it helps you learn about how to make one for yourself. As always please remember that I am only offering my experience and opinion. If you are having issues or a reaction; please see a medical professional.
| photos from brands |


No Comments